I remember the exact moment my clothes came out still damp, and I realized my gas dryer had refused to heat up properly. It was a cold winter day, and I had a mountain of laundry staring at me, stubbornly unfazed by my attempts to dry them. That lightbulb moment hit hard—why is my dryer, which used to run like a champ, suddenly stuck in cold cycles? If you’ve experienced a similar frustration, you’re not alone. Many homeowners in 2026 are noticing their gas dryers aren’t heating like they used to, and the worst part? They often have no idea what’s causing it or how simple the fix can be.
Stop Leaving Damp Clothes Behind: Here’s What I Learned About Gas Dryer Troubleshooting
People depend on their dryers to keep daily chores manageable. When yours decides to run cold, it disrupts your routine and leaves you questioning whether to replace the appliance altogether. Well, don’t jump the gun. In my experience, many issues stem from minor problems—like a faulty solenoid—that are surprisingly easy to fix, saving you money and time. We’ll explore how to identify these issues and prevent cold cycles from ruining your laundry days. Did your gas dryer suddenly stop producing heat? Stick around, because the solutions are more straightforward than you think. According to recent data, around 20% of household appliance failures in 2026 are caused by issues easily addressed with the right knowledge—like checking your dryer’s solenoid or ignition system. Once I understood this, fixing my dryer felt less daunting and more like a manageable DIY project. Now, let’s dive into how you can troubleshoot and solve this common problem without calling a professional every time. Is your dryer refusing to heat and leaving you stranded in laundry limbo? Keep reading—your next dry load might just be a simple fix away.
Check the Gas Supply and Ignition System
First, ensure your gas supply valve is fully open. Think of it as turning on the faucet before water flows; if the valve is closed or partially shut, the dryer won’t ignite. Next, inspect the igniter for cracks or burns. As I did during a messy Saturday repair, I disconnected the igniter and used a multimeter to test continuity. A broken igniter means no sparks to light the gas, causing cold cycles. If the igniter is faulty, replacing it is straightforward—just follow the manufacturer’s guide or consult a specific ignition test here. Remember, safety first: disconnect power before handling gas components.
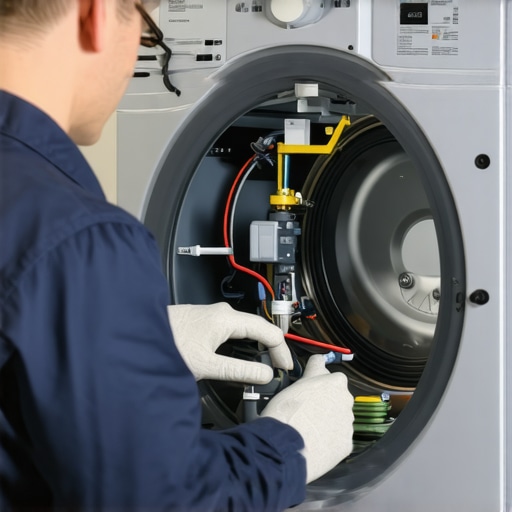
Examine the Gas Valve and Safety Features
The gas valve ensures fuel flow only when it’s safe. Imagine it as a gatekeeper; if it’s malfunctioning, gas won’t reach the burner. Test it with a multimeter for continuity between its terminals. If the valve is defective, replacing it will restore proper function. A quick tip: inspect the safety valve for clogs or blockages, similar to cleaning a filter, to prevent any safety lock from activating. For more detailed guides on valve checks, see this resource.
Clean and Maintain the Burner Assembly
The burner ignites the gas, much like a spark in a car engine. Over time, carbon buildup or lint can obstruct airflow, preventing ignition. During my last repair, I dismantled the burner assembly, carefully removing dirt and lint with a brush. Given the high temperatures, wear and tear are common—so replace damaged igniter brackets or electrodes to ensure a reliable spark. Regular cleaning can prevent future issues and improve efficiency. For comprehensive maintenance steps, review this guide.
Assess the Thermostat and Flame Sensor
The thermostat and flame sensor verify that the burner is operating correctly. Think of the flame sensor as the dryer’s thermostat’s watchdog, ensuring safety and efficiency. If faulty, the sensor might think there’s no flame, shutting the gas off. Test with a multimeter for proper resistance; replace if readings are inconsistent. Ensuring these components are clean and functioning prevents cold cycles and unsafe conditions. For deeper diagnostics, see sensor troubleshooting tips.
Inspect and Replace Faulty Valves or Sensors
Sometimes, the issue isn’t in the ignition or gas flow but a faulty control component. Think of these as the command center—if they malfunction, the entire sequence fails. Using an appliance schematic, identify wiring and voltage across these parts. Replacing faulty gas valves or sensors often resolves persistent heating problems. Remember, always verify the issue before replacing parts; testing with a multimeter or calling a professional if unsure can save you time and money.
Consider Upgrading to Smart Monitoring
Modern smart dryers offer diagnostic alerts and remote troubleshooting. Imagine having a mechanic in your pocket—smart diagnostics can alert you early to issues like low gas pressure or sensor faults. For a cost-effective upgrade, explore smart dryer features that can prevent future failures and help you catch problems before they escalate. This way, you’ll stay ahead of issues and maintain efficient heating without frequent manual checks.
While many believe that choosing between a clothes dryer, heat pump dryer, or gas dryer is simply about energy efficiency or upfront cost, the true complexities lie beneath the surface. One common myth is that all dryers are interchangeable in function, but in fact, each type involves distinct operating nuances that significantly impact performance, maintenance, and longevity. For example, heat pump dryers, often lauded for their energy savings, require careful attention to airflow and condenser cleanliness; overlooking these can lead to longer drying times and increased utility bills smart dryer tips. Conversely, gas dryers are more efficient for large households but pose safety considerations that many underestimate, such as venting hygiene and gas leak risks. A major misconception is that smart dryers automatically optimize drying cycles; in reality, they depend heavily on user settings and maintenance to function at peak efficiency. Advanced users understand that sensor calibration, cycle customization, and firmware updates are critical, thereby justifying regular diagnostic checks sensor troubleshooting. Oops, many homeowners get caught in the trap of neglecting ventilation. Lint buildup in vents or blocked filters is a silent culprit leading to prolonged drying times, higher energy use, and even fire hazards. The key is proactive maintenance rather than reactive repairs. For those considering the latest in laundry tech, smart dryers with AI-driven cycle adjustments are promising, but only when paired with proper upkeep—otherwise, their potential remains untapped.
How do advanced sensor systems in smart dryers really enhance drying efficiency without causing false triggers or over-drying?
An expert from the appliance industry highlights that sensor calibration and firmware updates are essential to prevent misdiagnoses, which leads to either energy waste or damp loads. In practice, this means periodically running diagnostic functions and keeping the dryer’s software current. Do you tend to overlook these small yet critical details? Your machine’s performance and safety depend on it. Remember, understanding the delicate balance between different dryer technologies and their specific maintenance needs can save money and extend your appliance’s lifespan. Have you ever fallen into this trap? Let me know in the comments.
Invest in Proper Tools for Troubleshooting
Having the right tools is crucial to maintaining your clothes dryer effectively. I personally rely on a high-quality multimeter, like the Fluke 117, because it provides precise readings of electrical components such as thermostats, sensors, and switches. This helps me detect issues early before they escalate into costly repairs. A set of flat-head screwdrivers and needle-nose pliers are indispensable for dismantling panels and accessing internal parts without causing damage. For cleaning lint traps and vents, I use a specialized dryer vent brush, which is narrow and flexible enough to reach deep into ductwork, removing dangerous lint buildup that can cause fire hazards. Regularly inspecting and cleaning these components ensures your dryer operates efficiently and safely.
Leverage Diagnostic Software and Apps
Modern smart dryers often come equipped with diagnostic modes that can identify issues with the touch of a button. I recommend using manufacturer-specific apps or third-party diagnostic tools compatible with your model to run quick health checks. For instance, some smart dryers allow firmware updates and sensor calibrations through their apps, which can prevent false sensing or over-drying. By regularly connecting your device to these tools, you maintain optimal performance. Looking ahead, the trend in laundry technology points toward AI-powered diagnostics that predict failures before they happen, similar to predictive maintenance in industrial equipment. Incorporating these tools into your routine can save time and money in the long term.
Schedule Regular Maintenance Checks
To sustain your dryer’s performance over time, establish a maintenance schedule. I recommend inspecting the venting system monthly, especially if you live in a humid climate or have pets, as dust and lint can accumulate rapidly. Make sure to clean out lint traps after every load and periodically check the vent hose for obstructions. Additionally, test safety components like thermostats and flame sensors at least once every six months using a multimeter, following guides from trusted sources such as this detailed troubleshooting guide. Consistent upkeep extends your appliance’s lifespan and ensures safe operation.
Optimize Your Dryer Settings and Cycles
Using the correct cycle and setting for each load can significantly improve efficiency and longevity. For example, avoiding over-drying by selecting sensor-based cycles reduces wear on clothes and the dryer itself. Advanced models with AI functions even adjust temperature and drying time automatically, but they require regular calibration to prevent issues like damp loads or excessive energy use. Reviewing your manufacturer’s recommendations and customizing settings accordingly can help maintain optimal operation. Additionally, exploring smart dryer settings such as those discussed here allows you to automate routine adjustments, saving you from guesswork and reducing utility bills.
Given these maintenance practices, where do you start?
One of the most effective steps is to implement a routine cleaning schedule for lint and venting components, as neglecting these can drastically reduce drying efficiency and pose safety risks. Try setting a reminder to inspect and clean your venting system monthly, using a flexible dryer vent brush. This proactive approach can prevent common issues and extend your appliance’s lifespan. For more detailed maintenance tips tailored to your specific dryer type—be it gas, electric, heat pump, or smart—I recommend reading this guide. Remember, regular care and the right tools make all the difference in keeping your dryer reliable and efficient for years to come.
The Hardest Lesson I Learned About Clothes Dryer, Heat Pump Dryer, Gas Dryer, Laundry Dryer, Smart Dryer
One crucial insight I gained was that most dryer issues are often simpler than they seem, but neglecting small routine checks can lead to big problems. Over time, I realized that consistent maintenance, like cleaning vents and testing sensors, saves time and money, and prevents unexpected cold cycles.
3 Myths About Clothes Dryer, Heat Pump Dryer, Gas Dryer, Laundry Dryer, Smart Dryer That Held Me Back
I used to believe that all dryers operate identically and that smart features automatically fix inefficiencies. Disproving this myth encouraged me to understand each technology’s nuances and the importance of regular calibration and manual inspections to truly optimize performance.
What Experts Won’t Tell You About Clothes Dryer, Heat Pump Dryer, Gas Dryer, Laundry Dryer, Smart Dryer
Professionals often overlook the impact of small filters or the significance of proper ventilation. Learning these insider secrets empowered me to enhance safety, efficiency, and prolong my appliance’s lifespan beyond standard advice.
Curated Recommendations for Dryer Enthusiasts
My Essential Toolkit for Dryer Maintenance: A reliable multimeter like the Fluke 117 is invaluable for diagnosing electrical issues, allowing me quick assessments when troubleshooting.
Deep Dive in Laundry Tech: The book “Smart Dryer Secrets” offers expert insights into optimizing modern appliances, revealing tips I couldn’t find elsewhere.
Reliable Sources for DIY Fixes: The appliance-specific guides at Smart Appliance Review provide step-by-step instructions, making DIY repairs accessible and safe.
Your Turn to Shine: Embrace Dryer Wisdom
If you start applying even a few of these maintenance ideas, you’ll notice smoother laundry days and fewer unexpected surprises. Remember, proactive care transforms a basic appliance into a trusted laundry partner for years to come. What maintenance step will you try first to improve your dryer’s performance? Share your plans below and let’s keep the conversation going!
Leave a Reply