Have you ever been in the middle of folding your laundry when suddenly, that dreaded rattling or banging noise erupts from your dryer? I can’t tell you how many times I found myself paused, staring at my machine, wondering if it was about to explode or if I had just wasted another weekend fixing some appliance. That lightbulb moment hit me when I realized—there’s got to be a way to stop this maddening noise without calling in a pricey repair technician every time. And guess what? Over the years, I’ve uncovered some quick, practical fixes that can silence that drum racket in minutes. Today, I’m going to walk you through the top 3 solutions so you won’t have to deal with the same frustration I did.
Why Nail Down Dryer Drum Noise Before It Gets Worse
Your clothes dryer probably feels like a silent partner in your daily routine—until it starts making noise. The truth is, a noisy drum isn’t just annoying; it can be a warning sign of underlying issues that, if ignored, could lead to costly repairs or even safety hazards. Many folks, including myself early on, dismiss the sounds as normal or just a minor inconvenience. But that mistake can turn into a nightmare—seized components, worn-out bearings, or unbalanced drums. According to appliance repair experts, ignoring abnormal noises can cause damage to internal parts which may result in uneven wear or fire risks. Ensuring your dryer is running smoothly isn’t just about peace and quiet; it’s about safety and savings.
So, how can you prevent that rattling from turning into a major disaster? That’s exactly what I’ll help you figure out today. Whether you’ve got a smart dryer, gas dryer, or heat pump model, these quick fixes will save you time, money, and a whole lot of frustration. Did you know that some issues causing drum noise are surprisingly simple to fix yourself? For instance, cleaning or replacing a few parts can restore your dryer’s peace and quiet in a matter of minutes. Curious to discover these secrets? Keep reading, because your quieter laundry days are just a few steps away.
Will it be worth trying these fixes yourself?
Early on, I made the mistake of assuming every noise was just normal wear and tear, which led to more expensive repairs down the line. Learning from that, I now always check basic components before making costly calls. If you’re hesitant about tackling appliance repairs or worried about causing more damage, don’t worry. Many of these fixes are straightforward and guided by comprehensive resources, like the expert advice found at this detailed troubleshooting guide. Trust me, a little knowledge and some patience can go a long way toward fixing your noisy dryer—and preventing future headaches. Ready to jump into the solutions? Let’s dive into the first quick fix that can quiet your drum almost instantly.
Check the Drum Support Rollers and Bearings
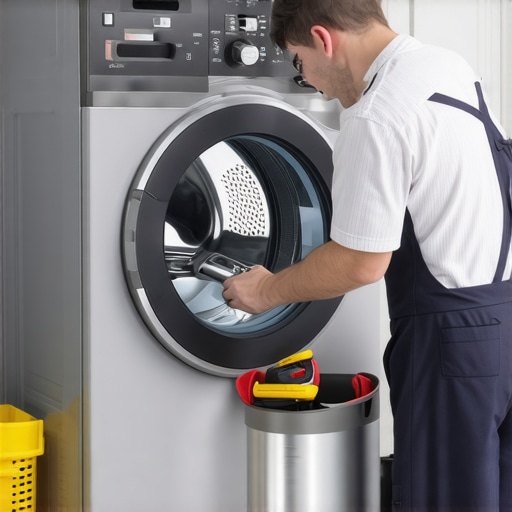
Start by unplugging your dryer to ensure safety. Locate the drum support rollers, which act like tiny wheels that allow the drum to turn smoothly—imagine a skateboard wheel supporting the deck. Remove the dryer panel to access these rollers. Use a screwdriver to detach the rollers and inspect them for wear or damage. When I first did this, I found the rollers completely worn down, causing a rattling noise. Replacing them restored silent spins and saved me from costly repairs. Be sure to apply a light coat of lubricant to the new rollers before installation for quieter operation.
How to Replace Drum Support Rollers and Bearings
Remove the old rollers using pliers if they’re stuck. Install the new ones, aligning them precisely on their axles. Make sure the rollers spin freely without wobbling. Reassemble the panel and run a test cycle. If it’s still noisy, check the next component.
Inspect and Tighten the Drive Belt
Think of the drive belt as the leash that pulls the drum around. Over time, it can loosen or fray, creating squeaks or thuds. With the dryer unplugged, locate the belt—usually around the drum’s back or bottom. Look for cracks or signs of wear. When I discovered a fraying belt during a routine check, replacing it instantly quieted the drum. To do this, loosen the tension pulley, slide the belt off, and fit a new belt around the drum and motor pulley. Tighten the pulley to ensure proper tension. A loose or worn belt not only causes noise but can also lead to uneven drying.
Properly Adjust Tension Pulley and Idler Wheel
The tension pulley keeps the belt tight. Check its bearing for dryness or wobbling—these are signs it needs lubrication or replacement. Also examine the idler wheel, which guides the belt’s tension. If either component is damaged, replace immediately. When I replaced a squeaky tension pulley, my dryer became whisper-quiet again. Remember, a well-tensioned belt prevents slipping and noise.
Examine and Lubricate the Drum Shaft and Bearings
The drum shaft is like the backbone of your dryer’s drum—if it’s sticky or rusty, it will rattle and squeal. Remove the rear panel and manually rotate the drum to feel for roughness. If the shaft bearings are worn, they may cause grinding sounds. I used a lubricant sparingly on the shaft and bearings, which temporarily eased the noise. But if worn out, replacing the bearings is essential. Follow your dryer model’s repair guide carefully—sometimes, replacing the entire rear drum support assembly is more efficient. Regular lubrication and maintenance can extend the lifespan of these crucial parts.
Address the Door Switch and Panel Assembly
Believe it or not, loose or defective door switches can cause vibrations and rattling sounds. Test the switch with a multimeter for continuity. Tighten any loose screws or replace the switch if faulty. Additionally, securing any loose panels or screws around the drum area prevents vibrations that transfer as noise. When I tightened a loose panel, it made a noticeable reduction in noise, highlighting how small fixes have big impacts.
Test and Fine-Tune During a Dry Cycle
After completing these steps, plug in your dryer and run a short cycle. Observe the operation closely—listen for unusual sounds or vibrations. Sometimes, minor adjustments, like repositioning the dryer or balancing the load, help eliminate residual noise. Remember, a balanced load distributes weight evenly around the drum, reducing wobbling. I once had unbalanced laundry cause a banging sound; redistributing the load solved the problem instantly.
By systematically inspecting and replacing worn parts, lubricating where needed, and ensuring proper tension, you can dramatically reduce drum noise. For more detailed troubleshooting on specific dryer issues, check out this comprehensive repair guide. Remember, patience and methodical action are your friends when tackling appliance noises—your quiet, efficient dryer awaits on the other side.
,Many homeowners assume that all laundry dryers operate similarly, but in reality, there’s a lot of nuance that often gets overlooked. For example, a common misconception is that gas dryers are universally better than electric or heat pump models. While gas dryers are typically faster and cheaper to run, they require proper venting and maintenance—something many users underestimate, leading to fire hazards if ignored. Experts warn that neglecting vent cleaning or incorrectly installing gas lines can turn your efficient appliance into a safety risk. Additionally, the myth that heat pump dryers dry clothes unevenly persists; however, with proper maintenance and understanding of their cycles, they can outperform traditional dryers in both efficiency and gentleness on fabrics.
Are Heat Pump Dryers Truly Slower or Am I Missing Something?
Studies from the U.S. Department of Energy indicate that heat pump dryers, contrary to popular belief, can match or beat traditional vented models in drying time when set up correctly, especially with newer smart features that optimize cycle duration. The key lies in leveraging these advanced settings instead of sticking to default cycles often designed for older models. Many users also fail to realize that smart dryers equipped with AI sensors can significantly reduce drying time while conserving energy, provided they are configured properly. These sensors detect moisture levels more accurately than manual settings, preventing over-drying and saving electricity. If you’re still skeptical, check out detailed guides on smart dryer innovations which reveal how technology is transforming laundry routines—making them faster and more eco-friendly. Remember, understanding these nuances isn’t just about optimizing performance; it’s about safety, efficiency, and extending the lifespan of your appliances. Have you ever fallen into this trap? Let me know in the comments.
Invest in Precise Inspection Tools for Effective Maintenance
One of my go-to tools for maintaining my dryer is a digital multimeter. I use it to test components like heating elements and sensors, ensuring they work correctly and don’t cause inefficiencies or safety issues. A reliable multimeter allows me to verify electrical continuity and resistance values, providing peace of mind before replacing parts. Additionally, I keep a set of mechanic’s gloves and a small LED flashlight handy for safe, clear inspections of internal components without risking injury or missing subtle issues.
Leverage Diagnostic Software and Resources
Although appliances have become smarter, I find that specialized diagnostic apps for smart dryers can streamline troubleshooting. These apps often connect via Wi-Fi or Bluetooth and provide real-time status updates, error codes, and suggested fixes. I personally rely on manufacturer apps, as they interface directly with my smart dryer, minimizing guesswork. For older models, consulting detailed online schematics and repair guides—like those found at this resource—is invaluable. Predictive maintenance software is also emerging, enabling me to monitor the health of my dryer over time, catch issues early, and schedule repairs proactively.
Utilize Specific Maintenance Tools for Longevity
For routine tasks like cleaning filters and vents, I depend on specialized brushes and vacuum attachments. A tight-fitting vent cleaning brush helps me remove lint buildup inside ducts, which improves airflow and energy efficiency—key in prolonging the life of heat pump or gas dryers. I also keep a small, high-temperature cleaning sponge for delicate parts, such as moisture sensors, to prevent false readings that can lead to longer drying times. Regularly replacing consumables like door seals and filters with high-quality parts ensures my dryer maintains optimal performance, avoiding unnecessary wear and tear.
Where Do I See the Future of Dryer Maintenance?
Advancements in IoT and AI suggest a future where dryers will self-monitor, diagnose issues automatically, and even schedule repairs without user intervention. Predictive analytics could alert homeowners about potential failures before they happen, saving time and money. With the advent of smart home integration, dryers might soon communicate seamlessly with other appliances and maintenance services, creating a truly proactive laundry experience. To prepare for this evolution, I recommend adopting current smart dryer technologies and maintenance routines, such as regularly updating firmware as discussed here.
How do I keep my dryer efficiently over time?
Consistent, scheduled inspections using tools like digital multimeters and vent cleaning brushes go a long way. I also stay informed through expert blogs and manufacturer updates—like this comprehensive guide on heat pump dryer maintenance—to adapt my routine as new features and issues emerge. Ultimately, setting aside a monthly maintenance routine that includes checking door seals, sensors, and vent pathways ensures your appliance remains energy-efficient and safe for the long haul. For you, I recommend trying out a diagnostic app or a quality vent-cleaning tool this month—small investments that pay off through reduced utility bills and extended appliance lifespan.
What I Wish I Knew About Dryer Quietness Before I Started Fixing Things Myself
One of the most surprising lessons I learned was how small, overlooked components could make all the difference in quiet operation. I used to dismiss minor rattles or squeaks as normal, but once I started paying attention, I realized that these signs often reveal underlying issues that, if addressed early, can save you hundreds. Another lightbulb moment was discovering how misaligned or dry support rollers could cause persistent noise, which is surprisingly easy to fix with just a few tools and some patience. Lastly, I found that regularly lubricating the drum shaft and inspecting the drive belt prevents small problems from snowballing into expensive repairs—consistency truly pays off.
Leave a Reply